Monday, January 24, 2011

Man Cave Madness

Here is my inspiration board so far for Ben's man cave project.  Ben is all but twitching from all the color infusion going on around our house.  I want this room to be for his comfort and enjoyment while also being accessible to guests.  I think I am going to go with a monochromatic room in two shades of gray on the walls and with a white media center and black denim recliners. 

Man Cave

Man Cave by shoeaddictthriving on Polyvore.com
Not the typically tacky man cave - an eclectic collection of traditional sideboard, flat screen TV, sheepskin rugs, and modern recliners.

I want to incorporate Ben's interests without the room getting too themed or kitschy.  Also, since the TV and furniture are going to be big ticket items I want to do the decor and accessories in the room on a tight budget.  I am going to do a series of collages for the wall art from University of Maryland yearbooks I have been collecting from flea markets and EBay.  I am using the photos of buildings and the sports section of each yearbook.  I am also trying to think of something that can incorporate the University of Maryland red in the room without being overwhelming. 

I have a couple more project ideas that I need to develop, but I feel like the man cave inspiration and plan is mostly in place.  Next I need to plan out when this will all start happening.

Saturday, January 22, 2011

Homemade Gift Exchange

I recently participated in a homemade gift exchange with my friends.  We agreed to make or buy gifts for each other for a $10 limit.  I decided to make scarves for everyone doing different color / pattern combinations for each girl.

I took a basic pattern and then changed it up for each one to make a different pattern of stripes.


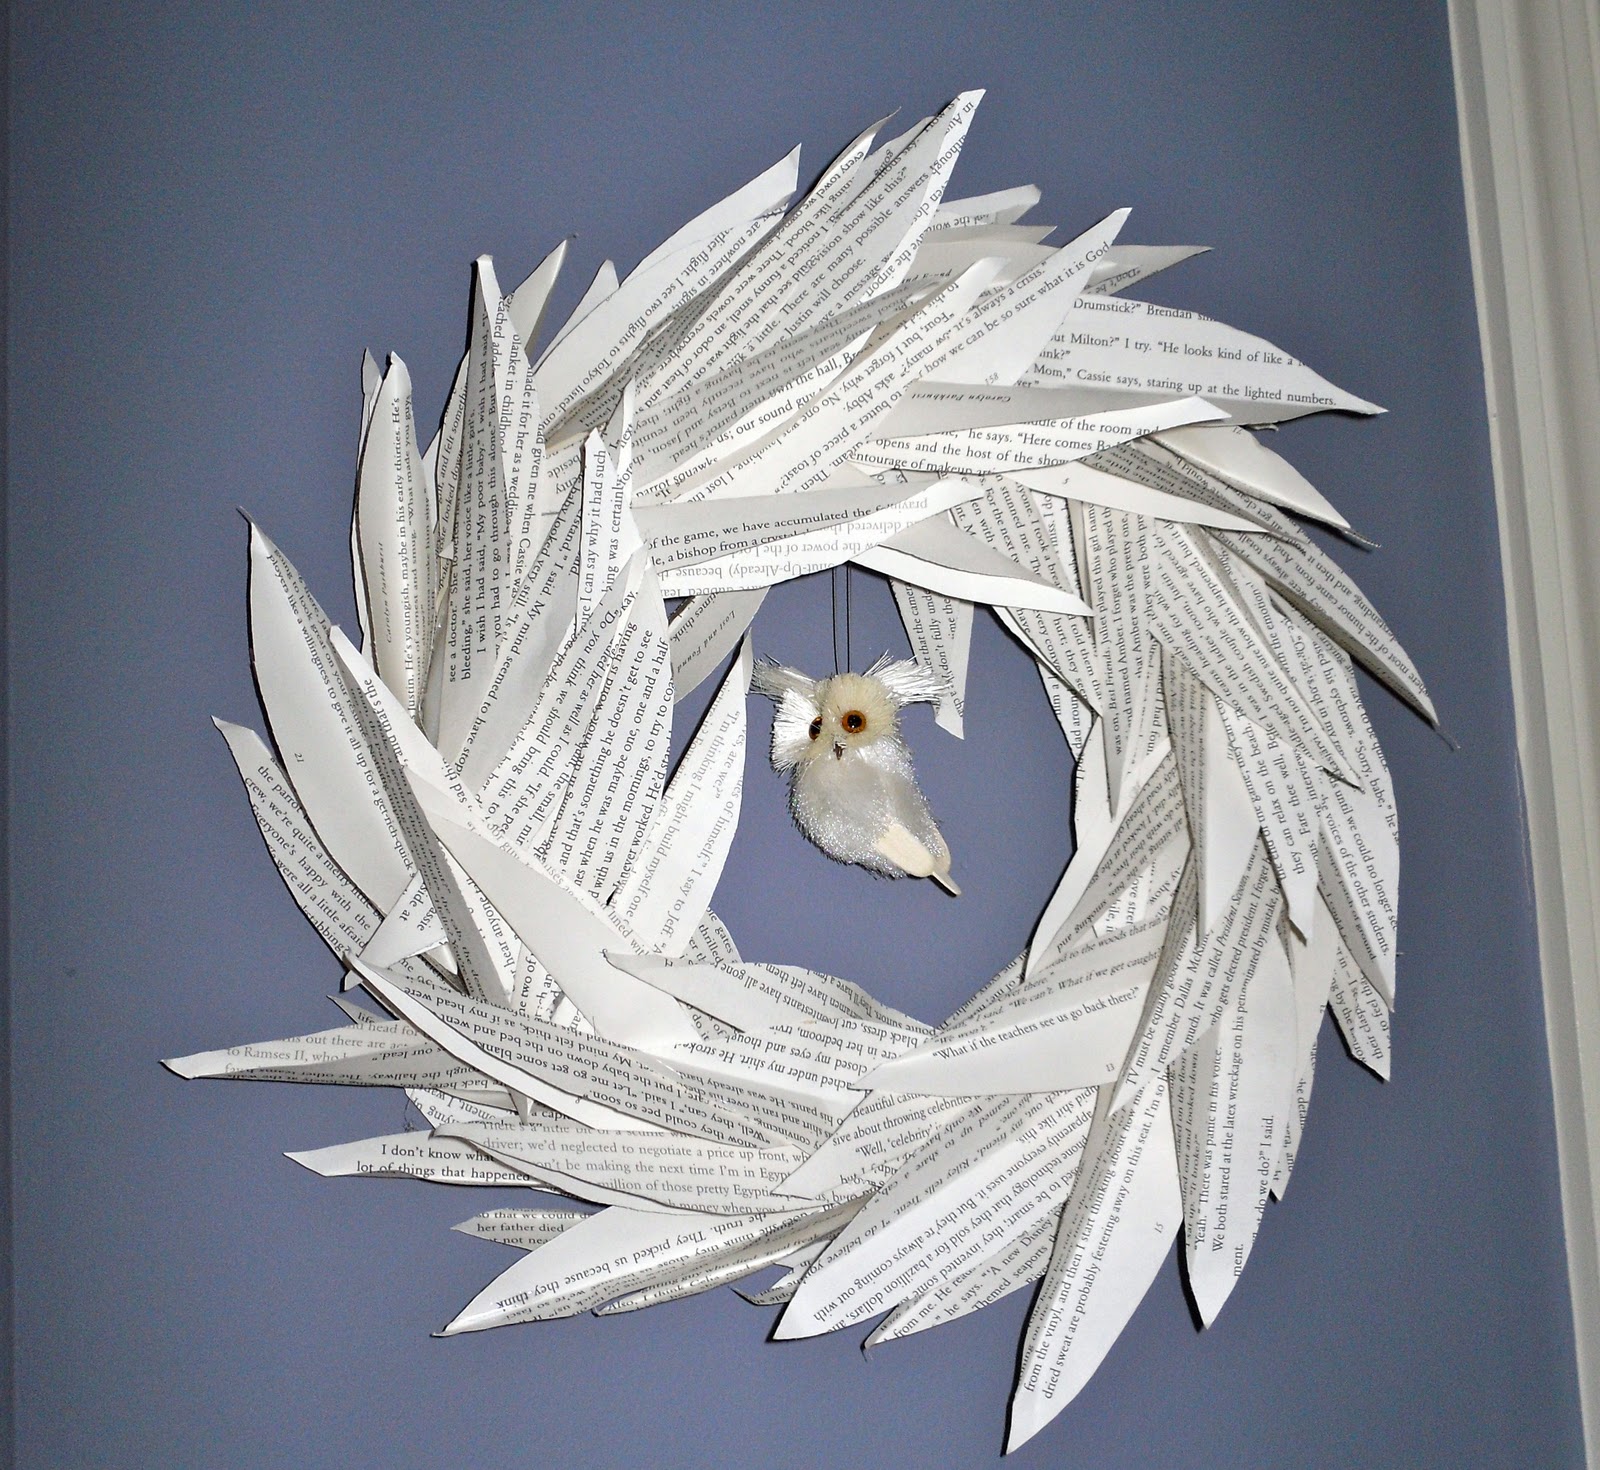
My friend Mrs. Oomph was a part of the gift exchange and made these awesome book page wreaths for us.  I actually had these on my list of projects to try, but a whole lot of deadline projects were way ahead of trying to make them.  I immediately picked the tiny one featuring an adorable owl ornament and it looks perfect in my room.

Despite the questionable literature featured on the leaves it is an awesome, unique, and handmade treasure that I love!

Thursday, January 20, 2011

Budget Buster - Wilton Class

I was very excited to start the Wilton cake decorating classes at my local craft store.  It seemed a pretty good bargain too at $27 for the four week course (one night each week).  With $5 off coupons for the two follow on classes I figured I was getting a pretty good class for not too much money.  The course ends up being a budget buster though.  Here's what I ended up spending:
  1. $71 for the class "tuition"
  2. $99 for the toolkit that I thought would provide the tools I needed for the first two courses (not the case)
  3. $50 for the course 2 and 3 class kits (after the 40% off coupons)
  4. $50 for decorator icing
  5. $8 for chocolate decorator icing
  6. $11 for colored fondant
  7. $20 for gum paste
  8. $7 for white fondant
  9. $3 cake leveler
  10. $10 cake lifter
  11. $9 cupcake decorating kit
  12. $10 tip covers
  13. $6 couplers
  14. $6 various decorating tips
  15. $8 icing colors
  16. $4 piping gel
  17. $6 meringue powder
  18. $14 turntable
GRAND TOTAL $392!!

 
This doesn't even include the cost of parchment and wax paper, cling wrap, cake boards, and ingredients for making the cakes.   Now this all was spent over 12 weeks so at $32/week it really sneaks up on you.  I didn't really have to buy everything that was on the list.  If you are interested in the class here's some tips to make it more budget friendly.


  1. $72 - just buy the class kits with the 40% off coupons and it ends up being cheaper than any of the bargain tool boxes
  2. $7 - make your own butter cream and cut down the cost of frosting significantly
  3. Skip the colored fondant - I didn't really miss it and I just used the $0.99 color to tint it for the class 
  4. Skip the cupcake kit - the cupcake nail was stupid and I didn't use it at all and the only tip I needed was the filler tip - order online before you start the class.
  5. Skip the tip covers - or buy only one pack when you get to the royal icing class.
Grand total $234 a $158 savings!  To save $30 more skip the extras like the cake lifter, extra bag of gum paste, extra tips, extra colors, and extra couplers.

Tuesday, January 18, 2011

Tip for Tuesday ~ Online Sources

I get all kinds of ideas online.  I also do a whole lot of my supply shopping online.  Here are some of my favorite online sources and what I use them for. 

Knitting-warehouse.com
This is my go to resource for buying crochet supplies online.  My favorite products on this site are the travel OK bamboo crochet hooks, Caron's simply soft and simply soft eco yarns, and Bernat's satin yarn.  My all-time favorite purchase was the Eagle good to go knitting tote which unfortunately the website doesn't carry anymore.  I would highly recommend getting one if you can find it somewhere!

wilton.com is my go to for all things cake decorating.  From ideas, techniques, to purchase of specialty cake pans I check this site to see if I can find it here.

goodybeads.com
I get many of my beads here.  My favorites from this site are the lamp work beads, the metal spacers, and metal round beads.

crochetpatterncentral.com has a huge library of free patterns for crochet.  I tend to scan this website for ideas when starting something I have never made before.  I usually get an idea of how it is put together and then change it up with colors and pattern to get exactly what I had in mind.  For the most part I have had success with the patterns and have had very little failures.  Tip: (pretty much all yarn brand websites also have a free pattern section for both crochet and knit.)

ehow.com is a vastly useful site.  I have used it to get everything from instructions on how to recover lamps and dining room chairs to making my own stencils.  I love browsing through ehow to research projects that are on my list and to find shortcuts and directions on things I haven't done before.

Monday, January 17, 2011

Monday Motivation - Transforming Ugly Storage

I was motivated by a comment on my first Monday Motivation post about ugly storage solutions.  Often times innovative and cheap free storage solutions are pretty ugly.  I have a super ugly free storage solution for my cat food in my kitchen - a rinsed out empty litter bin. 

I decided to go with the simplest and fastest solution available to me today.  I took some of the spray paint I recently got and spray painted the bin straw flower   yellow.  It took four coats of spray paint to cover the bin, but the end result is OK for now.  I may try to add a pattern to it with the left over colors of paint from my canvas project when I have time.

The bottom line is that for $3.87 I was able to make it look like a cute yellow container versus a old litter container.

Friday, January 14, 2011

Spray Paint - Why I love it and why I feel like a criminal when I buy it.

I love spray paint.  I received a gift card to the Depot of the orange and white logo for Christmas and thought about what I could get with it.  I decided on spray paint because I can always use spray paint.  I love it.  It makes for a quick update on items around your house. It is easy to use, dries quickly, and goes a long way to breath new life into old things.  I always feel like a criminal when I buy it though.  You may think to yourself, "Why would she feel like a criminal?  Maybe that's guilt coming up...maybe she is a criminal!"  All not true, however, the depot treating it like a controlled substance may have something to do with it.

I always feel a little conspicuous at the depot anyways.  I come in with my knee-high boots, crazy patterned tights, girly dress, and a feathered headband in my hair.  The male population of that store always approach with a John Wayne strut....hitching up their belts to cover more of their belly they saunter over.  I can practically hear the spurs in my mind as they say, "Anything I can help you with little lady?"  At first the feminist in me bristles at the "little lady", but then I realize that I am a lady compared to the normal clientele and I am quite little.  Maybe they are just literalists. 

 
I quickly say no and make a beeline to the paint department.  I know my way around the paint department.  Like I said before I use paint all the time.  (Especially spray paint - like the dining room chair I redid by spraying straw flower yellow.)  I quickly go to the spray paint part of it and start grabbing what I want/need.   Now here is where I start to feel a little conspicuous.  They sort of follow me over as if the thought of a woman in the depot not needing help is out of the realm of reality, or maybe they just noticed I didn't have a basket and think I may need help carrying stuff as my arms are tiny and practically useless much like a T-Rex.  Whatever their reasons I can't help but feel watched, and when I feel watched in a store I feel like they think I am up to no good. 

I worry that they are going to see me grabbing spray paint cans, remember that I am in the store several times getting more and more spray paint, and then somewhere out there will be a person who decides to graffiti this...


{Image Credit: morganico-com.deviantart.com}
...and they will totally think it is me!  So feeling watched, my arms full of spray paint cans, imagining the cat graffiti someone will finger me for I begin my way to the checkout.  I prefer going to self checkout whenever I can and so I go over and begin to scan my items.  As I swipe the first can the self checkout kiosk blares out, "Assistance needed.  Must show ID to purchase this item."  I have to then wait and try not to fidget out of impatience - fidgeting makes you look extra crime-y.  Finally the Grand Poobah of the self checkout section comes over and allows me to check out the rest of my items.

I always feel as I make my way out to the car a small thrill - like I got away with something.  It takes me a few seconds to remember that I am just buying spray paint to paint my old wall art a different color. 


Wednesday, January 12, 2011

Project Pictures - Cake Testing DISASTER!

I wanted to test out my 3 mini-tier cake pan that I just got.  My cousin is getting married in August and asked me to make her a wedding cake with a small tier that they can freeze for the one year anniversary tradition.  I immediately had feelings of stress and anxiety:
  1. I have trouble saying no to people.
  2. I have never done a stacked or tiered cake before.
  3. The wedding is more than two hours away from where I live.
  4. The wedding is an outdoor wedding which means fondant - and fondant is not my strong point.
  5. It is for some one's wedding!!!!  Stress!!
So when I saw her over the holidays and she asked me about it I started with a firm no.  Then I felt really bad and said... "Well, I can make you a cupcake.  Literally one cupcake for you to do the cake cutting ceremony and one for you to freeze."  When she said it could be the tiniest cake in the world and said it could be kept inside so that I can use butter cream v. fondant I caved like a cheap Ikea bookcase.  I felt infinitely better about the whole thing when I ordered a mini 3-tier cake pan.  They are supposed to look like tiny cute wedding cakes and so last night I tested baking and decorating them.


They are evil Satan Spawn!!!

I now give you pictures of the disaster also known as the demon cakes that refused to be iced by any means.  
The Damage in Total 

This one was an attempt at poured frosting...frosting failed.
Ben still ate it and said it tasted great.

This one was iced, re-iced, attempted quick-set fondant,
scraped off  quick-set fondant, and iced again.... I gave up.

This one I sort of liked.  Basket weave is the way to go.
There were two color flow birds that looked like they
were kissing, but one broke... one by itself = not so cute.