Showing posts with label Michael's. Show all posts

Wednesday, January 26, 2011

Project Pictures - Practicing with Mod Podge

 I have been wracking my brain and searching the Internets to figure out how to achieve the look I wanted for the wall art in Ben's man cave.  I wanted to mount the pictures from the University of Maryland on canvas and then hang the canvases on the feature wall of his room.

When I searched the Internet there were many websites that had snarky answers such as, "Why would you want to mount a photo on a canvas?  Why wouldn't you just have the photo printed on the canvas?"  I had basically given up on the idea and just decided to do the collage in giant frames from the craft store.

Luckily at the homemade gift exchange last Friday my friend introduced me to the little product known as Mod Podge.  I am not quite sure how I have made it this long without knowing what Mod Podge is, but am I glad she let me know about it!  I searched Mod Podge the other day and found that there are many how to articles on how to mount photo's to canvas with it.

digitalscrapbookplace.com had a lovely tutorial on making art on canvas.  They used one print out to cover the entire canvas.  Check it out for lovely ideas for canvas art.

ehow.com had many articles on how to use Mod Podge on canvas.  They say to use the fabric kind to mount things on canvas.

For my test run I simply used the matte finish regular kind.  I used an old canvas and painted it blue with left over latex wall sample paint.  I then took pictures of my niece, nephew, and dad to make a canvas "scrapbook page"  for my dad and mom.

I didn't do the most perfect job on it - some of the pictures are mounted crookedly.  I really just wanted to get an idea of how the product would work.  I was pleased with how easy it was to use, how it adhered the photos to the canvas, and how the finish looked.  I believe I have found the technique I am going to use...now to plan out the canvases themselves.

Thursday, January 20, 2011

Budget Buster - Wilton Class

I was very excited to start the Wilton cake decorating classes at my local craft store.  It seemed a pretty good bargain too at $27 for the four week course (one night each week).  With $5 off coupons for the two follow on classes I figured I was getting a pretty good class for not too much money.  The course ends up being a budget buster though.  Here's what I ended up spending:
  1. $71 for the class "tuition"
  2. $99 for the toolkit that I thought would provide the tools I needed for the first two courses (not the case)
  3. $50 for the course 2 and 3 class kits (after the 40% off coupons)
  4. $50 for decorator icing
  5. $8 for chocolate decorator icing
  6. $11 for colored fondant
  7. $20 for gum paste
  8. $7 for white fondant
  9. $3 cake leveler
  10. $10 cake lifter
  11. $9 cupcake decorating kit
  12. $10 tip covers
  13. $6 couplers
  14. $6 various decorating tips
  15. $8 icing colors
  16. $4 piping gel
  17. $6 meringue powder
  18. $14 turntable
GRAND TOTAL $392!!

 
This doesn't even include the cost of parchment and wax paper, cling wrap, cake boards, and ingredients for making the cakes.   Now this all was spent over 12 weeks so at $32/week it really sneaks up on you.  I didn't really have to buy everything that was on the list.  If you are interested in the class here's some tips to make it more budget friendly.


  1. $72 - just buy the class kits with the 40% off coupons and it ends up being cheaper than any of the bargain tool boxes
  2. $7 - make your own butter cream and cut down the cost of frosting significantly
  3. Skip the colored fondant - I didn't really miss it and I just used the $0.99 color to tint it for the class 
  4. Skip the cupcake kit - the cupcake nail was stupid and I didn't use it at all and the only tip I needed was the filler tip - order online before you start the class.
  5. Skip the tip covers - or buy only one pack when you get to the royal icing class.
Grand total $234 a $158 savings!  To save $30 more skip the extras like the cake lifter, extra bag of gum paste, extra tips, extra colors, and extra couplers.

Friday, January 7, 2011

I've Made a Huge Mistake - Scarf Disaster


{Image Credit: http://www.patonsyarns.com/}
 So  it all started with my love of Paton's Divine yarn.  It is the fuzziest, softest feeling, puffiest looking yarn ever.  I fell in love with it.  I promptly made myself my very first crochet project of a scarf and matching hat.  I made scarves and hats for a few of my friends.  Unfortunately the yarn contains 10.5% wool and 10.5% mohair.  I discovered quickly that I had reactions to wearing anything made with any kind of animal hair.  Rabbit hair, mohair, wool, cashmere...all out. 

I always look longingly at the cashmere displays in the department stores.  I run my hands over soft fuzzy knit hats, scarves, and sweaters immediately begin itching and break out in a rash from face to belly.  I had to give up my first scarf and hat.  I now religiously read labels to see what the fabric contents are, and I constantly search for soft fuzzy yarn that is made from acrylic or some other material that will give me the same feel of the Paton's yarn.

Recently I went to my local craft store and saw a new brand of yarn in its expanded yarn section.  There on the shelf with a shaft of the purest light shining upon it was the yarn - Loops & Threads Sante Fe Striped Brushed yarn.  It looked so inviting, the color combinations pretty, and I thought to myself, "It can't be soft because it's probably wool."  I ran my hand over it.  It was soft.  I held my breath as I pulled it off the shelf and looked at the content... a host of angels began softly singing as I read  - 88% acrylic 12% polyester. 


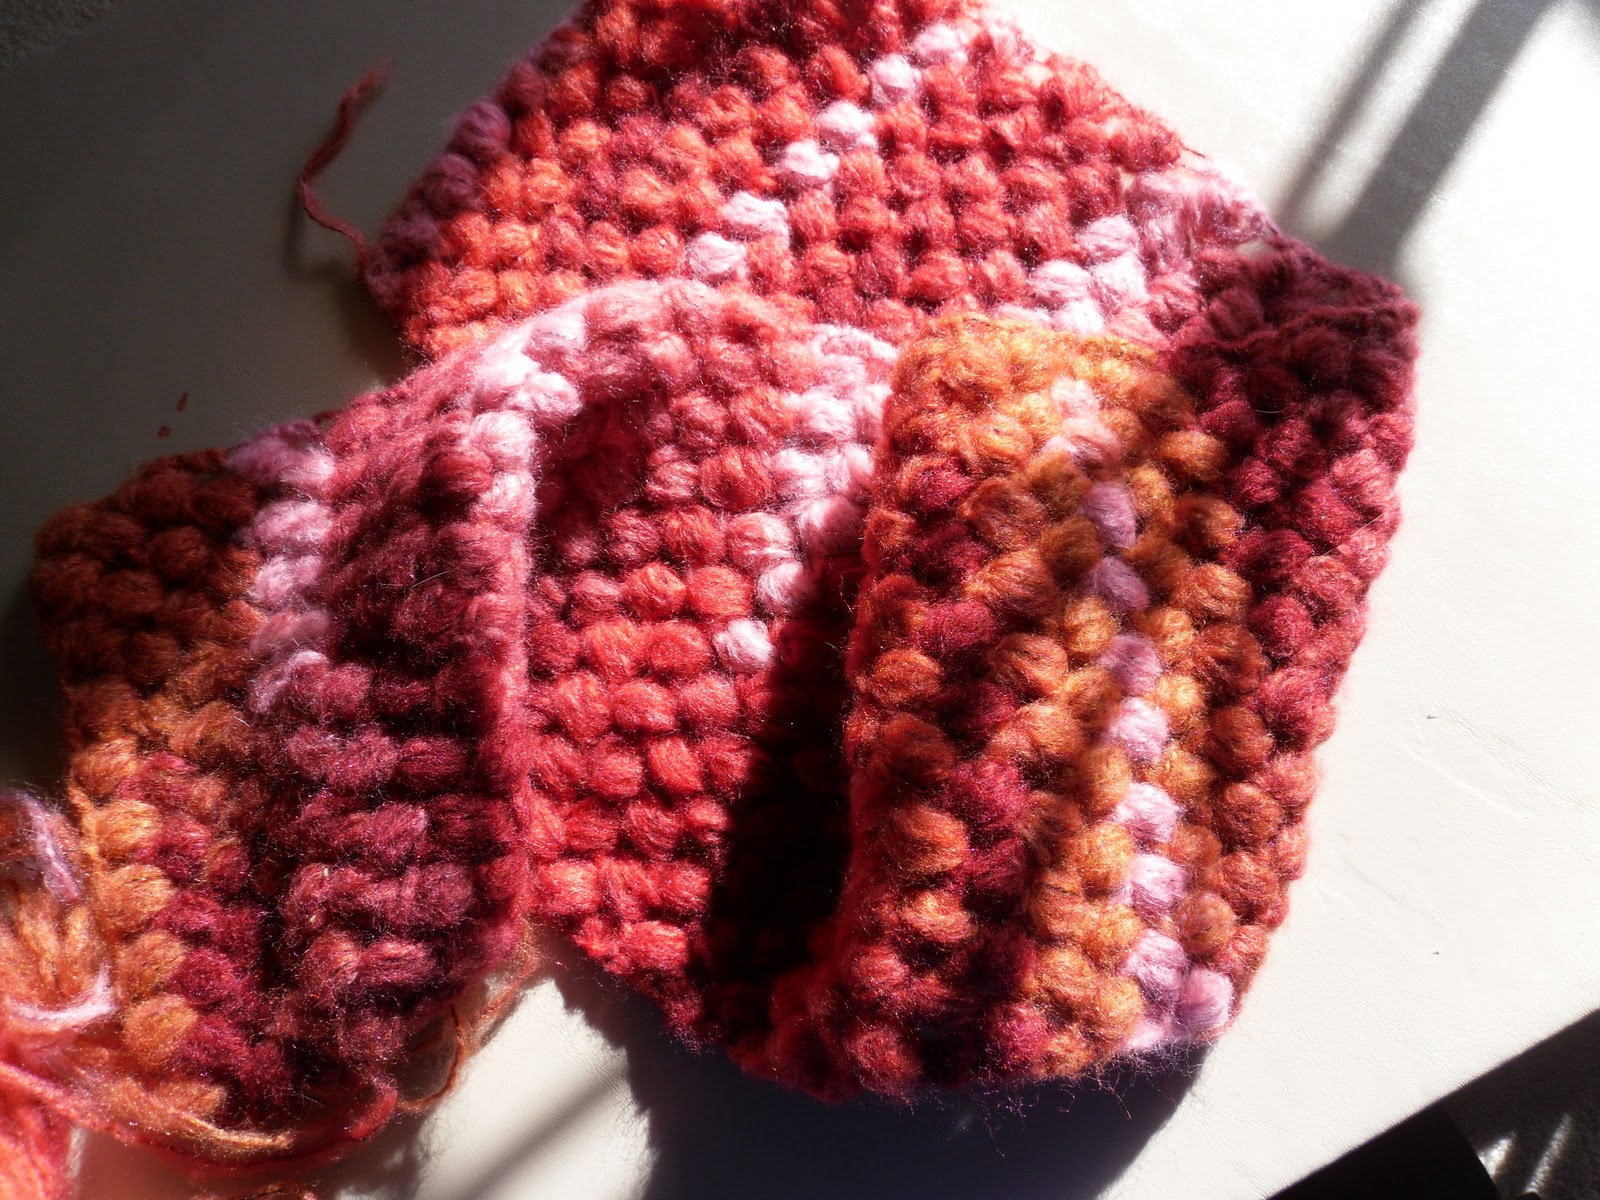
I was so excited.  I broke my budget rules and binged.  I got three skeins of each color, and at $4.99/skein it was not a cheap bill.  I got home and began my scarf.  I used the skein that was hand painted in reds, pinks, and oranges.  Well, I made a huge mistake.  Almost at the end of one skein I looked down and realized - It looks like I skinned Animal from the Muppets and made him into a scarf.


Not every project turns out how you pictured it in your mind, but in crafting you learn from these happy failures and move on.  There is always the good and the bad and the unintentionally ugly.  I am still going to wear the scarf...it does have some kind of retro 70's appeal to it.  If you realize early on that your project is headed for disaster try to abandon ship.  If you realize it half way through try to think of a way to correct course and fix it.  And if you get to the end look down and realize you have created a great big pile of fugly - toss it, donate it, or wear your mistake proudly.

Animal {Image Credit: Muppet Central.com}