Showing posts with label Cost Saving. Show all posts

Wednesday, February 23, 2011

Binge v. Budget: Canvases

Image Credit {diyideas.com}
I went to go buy some canvases for the wall art collages in Ben's mancave.  I took Ben with me because I was getting some pretty large canvases and needed his large manly arms to carry them through the store for me.  (He did very well at this task except for when we got to the registers and he turned abruptly towards me to ask me a question and hit me in the face with them.)  He gasped quite loudly and protested greatly when we walked around the corner and he saw a 16x20" canvas on sale for $50. 
I quickly explained that this was the professional grade, heavy duty, gallery wrapped canvas....we were going for the cheap stuff - back stapled, on sale, and about  $20 (sale price) for a 24x48" canvas.  If you are a professionally trained artist and you are planning on doing high-end works of art worthy of the MoMA then by all means get the professional high quality canvas.

However, if you are like me and just dabble in DIY wall art made on the cheap so you don't feel guilty when you swap it out in six months, then I suggest you get the cheap stuff.  Here are some fun article ideas for DIY wall art on canvas.

Wednesday, January 26, 2011

Project Pictures - Practicing with Mod Podge

 I have been wracking my brain and searching the Internets to figure out how to achieve the look I wanted for the wall art in Ben's man cave.  I wanted to mount the pictures from the University of Maryland on canvas and then hang the canvases on the feature wall of his room.

When I searched the Internet there were many websites that had snarky answers such as, "Why would you want to mount a photo on a canvas?  Why wouldn't you just have the photo printed on the canvas?"  I had basically given up on the idea and just decided to do the collage in giant frames from the craft store.

Luckily at the homemade gift exchange last Friday my friend introduced me to the little product known as Mod Podge.  I am not quite sure how I have made it this long without knowing what Mod Podge is, but am I glad she let me know about it!  I searched Mod Podge the other day and found that there are many how to articles on how to mount photo's to canvas with it.

digitalscrapbookplace.com had a lovely tutorial on making art on canvas.  They used one print out to cover the entire canvas.  Check it out for lovely ideas for canvas art.

ehow.com had many articles on how to use Mod Podge on canvas.  They say to use the fabric kind to mount things on canvas.

For my test run I simply used the matte finish regular kind.  I used an old canvas and painted it blue with left over latex wall sample paint.  I then took pictures of my niece, nephew, and dad to make a canvas "scrapbook page"  for my dad and mom.

I didn't do the most perfect job on it - some of the pictures are mounted crookedly.  I really just wanted to get an idea of how the product would work.  I was pleased with how easy it was to use, how it adhered the photos to the canvas, and how the finish looked.  I believe I have found the technique I am going to use...now to plan out the canvases themselves.

Saturday, January 22, 2011

Homemade Gift Exchange

I recently participated in a homemade gift exchange with my friends.  We agreed to make or buy gifts for each other for a $10 limit.  I decided to make scarves for everyone doing different color / pattern combinations for each girl.

I took a basic pattern and then changed it up for each one to make a different pattern of stripes.


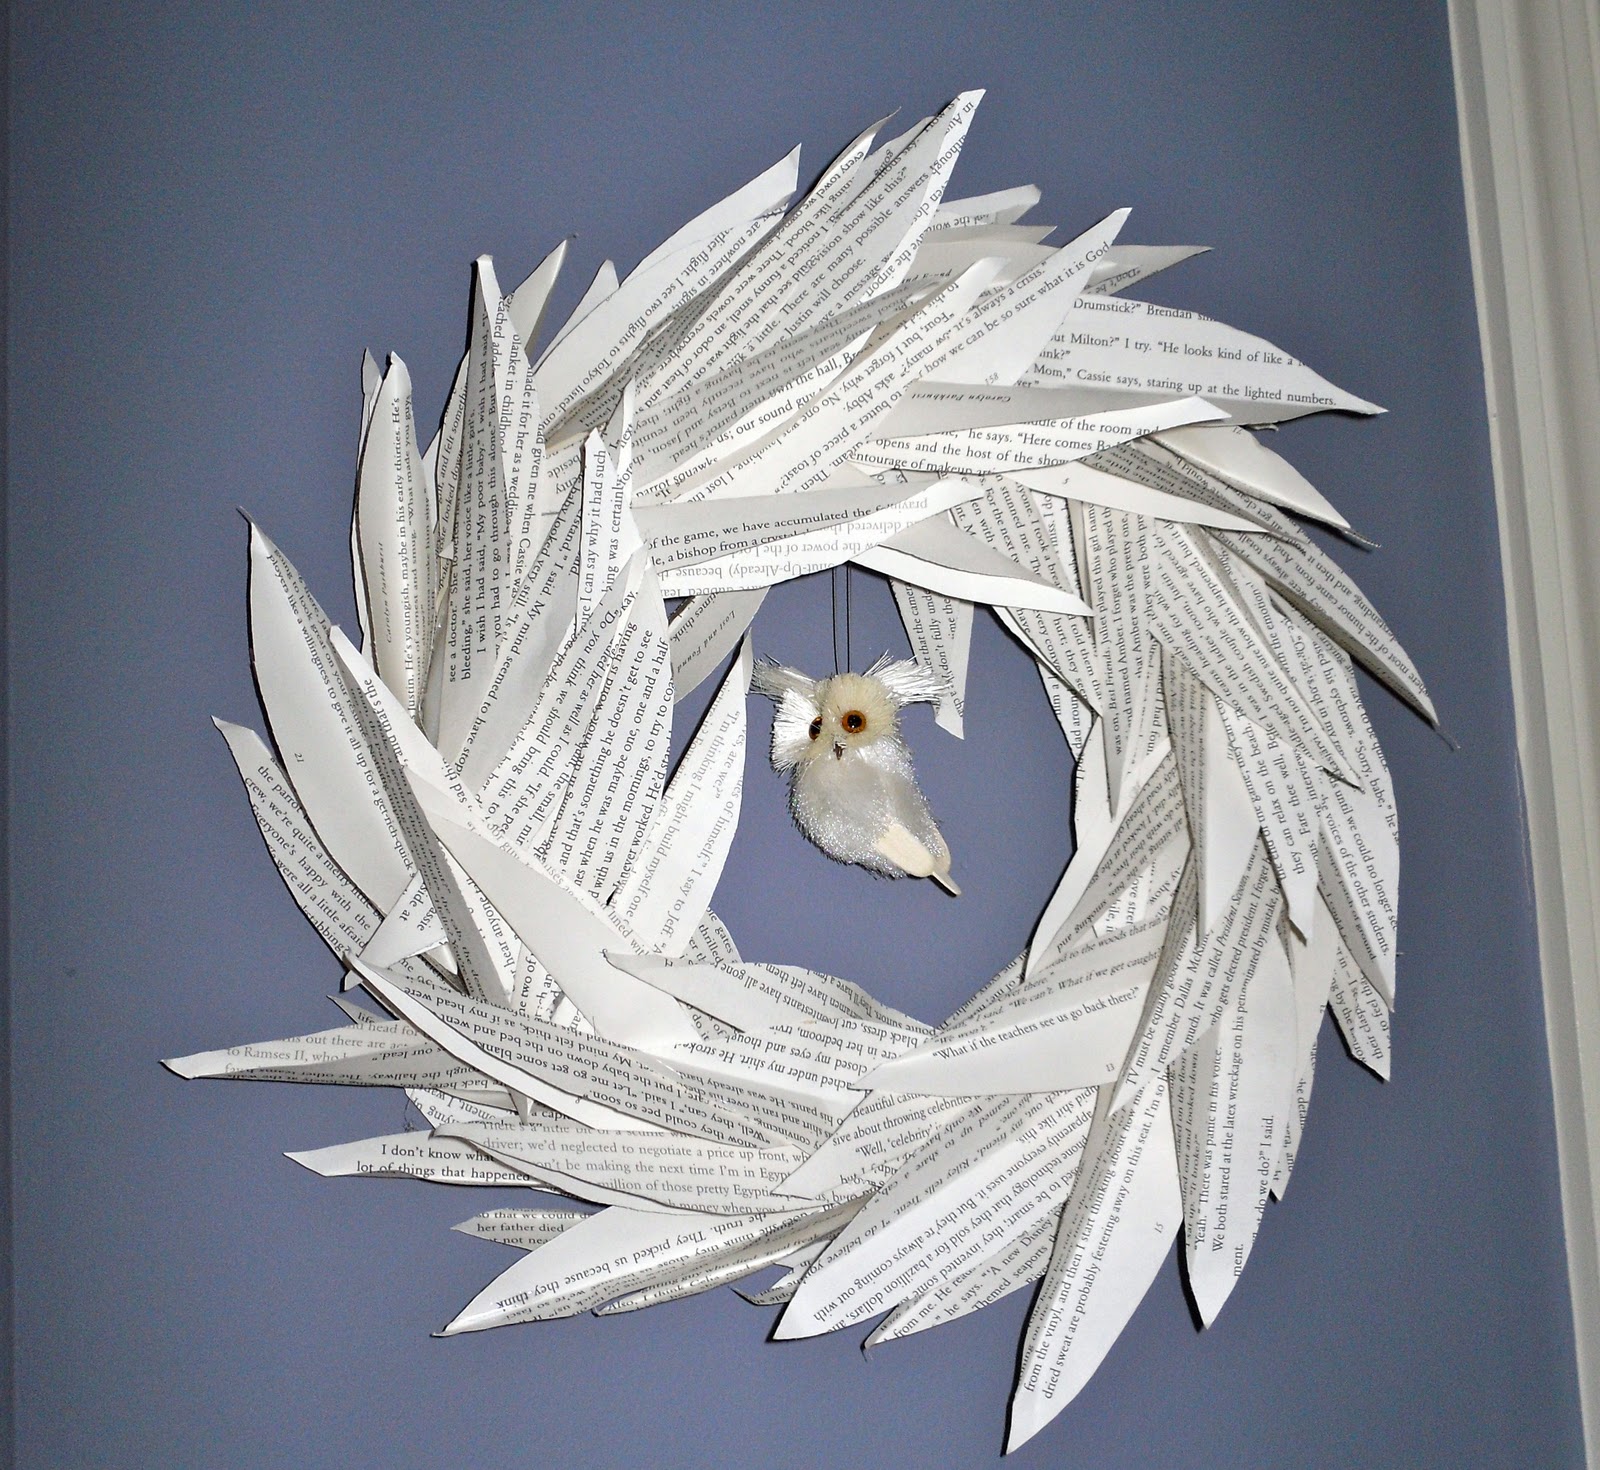
My friend Mrs. Oomph was a part of the gift exchange and made these awesome book page wreaths for us.  I actually had these on my list of projects to try, but a whole lot of deadline projects were way ahead of trying to make them.  I immediately picked the tiny one featuring an adorable owl ornament and it looks perfect in my room.

Despite the questionable literature featured on the leaves it is an awesome, unique, and handmade treasure that I love!

Thursday, January 20, 2011

Budget Buster - Wilton Class

I was very excited to start the Wilton cake decorating classes at my local craft store.  It seemed a pretty good bargain too at $27 for the four week course (one night each week).  With $5 off coupons for the two follow on classes I figured I was getting a pretty good class for not too much money.  The course ends up being a budget buster though.  Here's what I ended up spending:
  1. $71 for the class "tuition"
  2. $99 for the toolkit that I thought would provide the tools I needed for the first two courses (not the case)
  3. $50 for the course 2 and 3 class kits (after the 40% off coupons)
  4. $50 for decorator icing
  5. $8 for chocolate decorator icing
  6. $11 for colored fondant
  7. $20 for gum paste
  8. $7 for white fondant
  9. $3 cake leveler
  10. $10 cake lifter
  11. $9 cupcake decorating kit
  12. $10 tip covers
  13. $6 couplers
  14. $6 various decorating tips
  15. $8 icing colors
  16. $4 piping gel
  17. $6 meringue powder
  18. $14 turntable
GRAND TOTAL $392!!

 
This doesn't even include the cost of parchment and wax paper, cling wrap, cake boards, and ingredients for making the cakes.   Now this all was spent over 12 weeks so at $32/week it really sneaks up on you.  I didn't really have to buy everything that was on the list.  If you are interested in the class here's some tips to make it more budget friendly.


  1. $72 - just buy the class kits with the 40% off coupons and it ends up being cheaper than any of the bargain tool boxes
  2. $7 - make your own butter cream and cut down the cost of frosting significantly
  3. Skip the colored fondant - I didn't really miss it and I just used the $0.99 color to tint it for the class 
  4. Skip the cupcake kit - the cupcake nail was stupid and I didn't use it at all and the only tip I needed was the filler tip - order online before you start the class.
  5. Skip the tip covers - or buy only one pack when you get to the royal icing class.
Grand total $234 a $158 savings!  To save $30 more skip the extras like the cake lifter, extra bag of gum paste, extra tips, extra colors, and extra couplers.

Monday, January 17, 2011

Monday Motivation - Transforming Ugly Storage

I was motivated by a comment on my first Monday Motivation post about ugly storage solutions.  Often times innovative and cheap free storage solutions are pretty ugly.  I have a super ugly free storage solution for my cat food in my kitchen - a rinsed out empty litter bin. 

I decided to go with the simplest and fastest solution available to me today.  I took some of the spray paint I recently got and spray painted the bin straw flower   yellow.  It took four coats of spray paint to cover the bin, but the end result is OK for now.  I may try to add a pattern to it with the left over colors of paint from my canvas project when I have time.

The bottom line is that for $3.87 I was able to make it look like a cute yellow container versus a old litter container.

Thursday, January 6, 2011

Budget v. Binge - Yarn

I have two modes when purchasing yarn for projects: budget or binge.  Usually binging wins out and I end up with way more yarn than what I need.  I end up buying too much because I but it online.  One of my favorite resources for all things yarn is http://www.knitting-warehouse.com/.  When I get on the website to order the color and quantity I need for a new project I end up getting distracted by all the other colors available.  I think to myself, "Well, that's a really pretty color and I can always use that in another project."


Well, now I have ended up with 6 bins overflowing with various yarn - some colors I have never used.  So I still end up binging, but I have made myself practice discipline when it comes to new projects. 

Are there situations where it is actually good to binge?  The answer is yes.  I am constantly re-ordering my neutrals.  White, Cream, Tan, Camel, Light Brown fly out of my bins faster than anything in my hobby room.  I also make baby blankets so colors like the softest shade blues, greens, purples, pinks, and yellow are good to have on hand in larger quantities. Crochet is one of my most participated in hobbies so I do dedicate more of my hobby spending money and organization space to yarn.  I still order my neutrals and baby blanket colors online when I am running low and order large quantities of them.  I have been mid-project and lost steam to finish it because I needed more of a color.  However, I have started practicing budget when it comes to special projects and non-typical colors. 

One thing that really undermines my budget mentality is when I go to the store, they don't have the yarn I need, and I have to go online to order it.  My binge temptation is always online, but yours may be when you go in the store and see all the lovely colors and types of yarn.  Know your weaknesses and try to use avoidance as a method of dealing with it.  If you can be disciplined online then don't drive to the store or stay away from the yarn section when you are there for something else.  If online shopping makes it too easy for you to order en mas then drag yourself out to get supplies for the project that you are starting.  (Project planning helps with sticking to your budget - post on this topic coming next week.)  

When to budget - when your spending money is tight.  To help budget:
  1. Plan out your project.
  2. Look at your inventory - can you adjust your plan to use something you already have?
  3. Shop around - don't just go to Michael's: look for prices online (don't forget to add shipping into the price/skein), think Walmart, and use coupons (http://www.michaels.com/ always has 40% coupons).
  4. Only buy what you need.
When to Binge - when all three of the following are making the perfect storm:
  1. When you have extra cash on hand.
  2. When you have a need for yarn (some of you standard colors are low/gone in your inventory)
  3. There is a sale on yarn.
So, keep in mind that planning, budgeting and discipline help eliminate overspending, overflowing mess, and unnecessary inventory.

Tuesday, January 4, 2011

Tip for Tuesday: Fake it


Chair from Arhaus furniture

I decided that I am sick of buying generic wall art even if I get it cheap from somewhere.  I figure... even though I don't really know what I am doing.... I can fake it.  I recently made a series of wall art for my kitchen makeover.  I was inspired by a new chair with a unique pattern that my husband let me get for our anniversary.  I really wanted to tie in the pattern, colors, and feel of the chair into my whole living space.  I started by taking pictures of different "pieces" of the pattern that I liked.    I got these photos printed in the size of the canvases I was going to paint on.  I got a cheap 10 pack of canvases for about $10 at Michael's for this.  I probably could have achieved the same look by just framing the prints, but I love the texture that canvas and real paint add.

I then traced the larger shapes and parts of the pattern onto tracing paper in order to make a stencil.  I used an exacto knife to cut out pieces of my homemade stencil and then traced the overall shapes onto the canvases.  For example: in the following picture I first cut out the "meat" of the bulb and the stem shapes.   You can see on the left where the red arrows are pointing on the photo.  I after I had the basic shapes traced on the canvas I added in the details by hand.  As you can see the patchwork pattern on the largest part of the bulb is not remotely the same, but it still gives the overall appearance and feel of the original pattern.  

For paint I had already purchased sample interior latex paints from colors in the pattern to decide what colors to carry over onto the kitchen walls.  I used the sample paints to paint in the details of the patterns.  I ended up doing at least two coats of each color.  The paints cost about $3 each for a total cost of $39.  I would have used regular acrylic paints, but didn't want the sample paints I had already purchased to go to waste.  In total the project cost me $49 and gave me a large statement wall in the kitchen.


It took me about 2 hours to complete each canvas.  The latex paint dried fast and I was able to start the second coat as soon as I had finished the first coat.  When I finished all of my canvases I just arranged and re-arranged them on the floor in front of the wall they were going on until I had what I wanted. 


For those that will look at this and say, "I am not artsy at all.  I don't know how to paint."  Try this for a similar look.  Get stencils of patterns at your local art/craft store.  Stencil the patterns on various canvases and then paint them in.  (If you want to do it really fast you can use spray paint or roll one color on with a mini roller!)  You can do the same pattern with the canvases facing different ways like above or you can really mix it up and paint the pattern in a variety of colors and color combinations to make your own one of a kind wall art.  

You don't have to be a trained artist to have original art hanging on your walls - just fake it with confidence.  If you have any suggestions of DIY wall art add it in the comments!

Monday, January 3, 2011

Monday Motivation

On New Year's Eve I was over our friends house and saw a shelving unit in her children's playroom that made me go ooooooohhhhhh! I was immediately inspired to organize my room of shame. The shelving system was from Ikea and although it was designed to be storage for children it is perfect for my craft room.  Then the next day I got this article in my email  Better Homes and Gardens - tips for organization room by room.  While the rooms didn't include an office, craft, or hobby room alot of the tips are applicable. 


TROFAST storage (credit http://www.ikea.com/)
 So now thoroughly motivated, I dragged poor Ben (husband of 5 years) out and then spent hours and hours in Ikea. I will say that I had some extra cash so I was able to get 5 of the shelving units which gave me 5 shelves and 27 bins worth of storage for a cool $313.  Now if you have to purchase organization that is not to bad as far as cost goes.  By the by.... the other storage I had in the room which didn't hold all my things that well and I had slowly purchased on what I thought what was the cheap over the years actually had cost me  $518.21!!!  Not to name names, but this system was from a large chain with a distinct red circular logo.  (Lest you think me wasteful it is bring re-purposed in other room closets for storage.  Now that I added it up and know how much in total it cost it's getting used until it falls apart.)


Drawer Storage - jeanettes.typepad.com
 If you do not have the extra money lying around, however, and you already have plastic storage units I would recommend using the bins you already have to save money. Another out of the box, cost-saving storage unit is using bookshelves purchased from yard sales, flea markets, Craig's list, or even better free on http://www.freecycle.org/ and utilizing extra boxes and baskets as the organization bins.  (The dollar store does have small plastic craft organizers and baskets.) 

Does anyone else have any out of the box storage ideas? (Comments and ideas welcome!)